|
Basics
of Figure Painting
By
Michael Johnson
The
following is a very basic process to give your figures a
realistic appearance. The paint scheme uses an enamel base
and artists oils to highlight and shadow. I use the same methods
described below to paint all the Aces of Iron® figures on this
site.
Philosophy-
Whether you are painting flesh, leather canvas or metal, the
basic idea of figure painting is to paint a mid tone base, wash
with a dark shadow tint, then add light highlights. The
combination of enamels and artists oils allows a simple and
effective method to achieve dramatic results with limited
budget and time and requires surprisingly little artistic
background. The translucence of the oils allows remarkable
detail with simple layering and the long set time of the oils is
very forgiving for first time painters. Supplies: Paints
-
Small
tin of good base enamel, I
prefer Humbrol Enamel Flesh (Matt# 61), but Tamiya Flat
Flesh XF-15 Acrylic is also a good base.
-
Small
tube of artist oil "Burnt Sienna"
-
Small
tube of artist oil "Cadmium Yellow"
-
Small
tube of artist oil "Flat or Flake White"
-
Small
tube of artist oil "Raw Umber"
-
Small
tube of artist oil "Cadmium Red"
-
Testors
"Dullcote" spray paint
Brushes
-
Small
detail
brush- Sable Hair or soft bristle
-
Medium
detail brush- Sable Hair or soft bristle
-
Medium
Flat
brush- Sable Hair or soft bristle
Miscellaneous
Part
I: Skin Tones
|
|
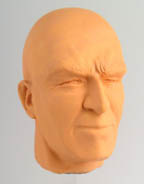
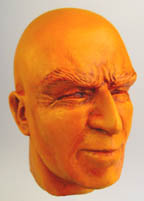
Step
1 (Base Coat) - Paint
the entire surface with a base coat. I prefer Humbrol Enamel
Matt Flesh #61. Allow about 24 hours for the base to completely
dry.
|
|
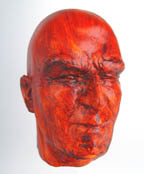
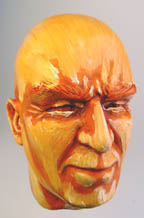
Step
2 (Shadow Base) - Paint
the entire surface with "burnt sienna" artist oil.
Apply the coat fairly thick and make sure you work paint into
all the crevices. Clean your brush on the soft dry cloth, do not
use turpentine, just keep wiping the brush on the cloth.
|
|
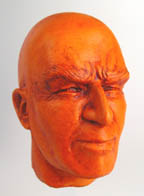
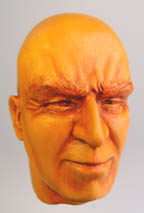
Step
3 (Shadow Tint) - Use
the soft flat brush to gently remove the excess paint from the
raised areas of the face. Wipe the brush on the soft dry cloth
to remove the paint you remove from the raised areas of the
face. Continue the process until you achieve a soft contrast
between the shadows and the raised highlights.
|
|
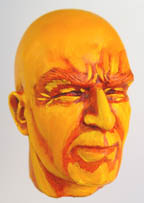
Step
4 (Highlight Base) - Use
the medium detail brush to apply a thin layer of "Cadmium
Yellow" to the raised areas. Allow the paint to set for
about an hour before proceeding.
|
|
Step
5 (Highlight Blend) - Use
the clean soft dry detail brush to gently blend the yellow
highlights. Blending is a process of removing the thick areas of
the paint with the soft dry brush and blending the edges into
the undercoat with a soft zig-zag motion.
|
|
Step
6 (Highlight 2) - Use
the medium detail brush to apply a thin layer of "Flat or
Flake White" to the same raised areas from step 4. Allow
the paint to set for about an hour before proceeding.
|
|
Step
7 (Highlight 2 Blend) - Use
the clean soft dry detail brush to gently blend the white
highlights using the same blending process described in step 5.
|
|
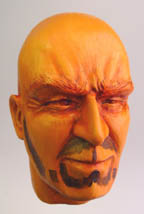
Step
8 (Beard Shadow) - Use
the small detail brush to apply a thin layer of "raw
umber" to the areas of the face where beard grows. notice I
only apply paint to about half the area leaving the highlight
areas unpainted. The thickness of the layer will determine the
amount of "growth" in the final face; Thin for less
growth, thick for more growth.
|
|
Step
9 (Beard Blend) - Use
the medium detail brush to blend the beard layer into the
remaining portions of the face where beard grows, use the dry
brush to remove most of the paint to leave just a subtle hint of
beard.
|
|
Step
10 (Red Tint) - Use
the small detail brush to apply a thin layer of "Cadmium
Red" to the cheekbones of the face and the lower lip (no
paint on the upper lip or he'll look like he's wearing
lipstick).
|
|
Step
11 (Red Blend) - Use
the medium detail brush to blend the red layer, use the dry
brush to remove most of the paint to leave just a subtle tint of
red.
|
|
Step
12 (Final White Highlight) - Use
the small detail brush to add "flat or flake white"
highlights to the detail areas shown. Wait one hour for the
paint to "set" before proceeding to the blending step.
|
|
Step
13 (Blend White Highlight) - Use
the small detail brush to gently blend the white
highlights of the detail areas. This time don't remove as much
of the white layer as in previous steps. This will add nice
contrast in the final piece.
|
|
Step
14 (Final Dark Shadow) - Use
the small detail brush to add "raw umber" to the
detail areas shown (Edge of nose, Thin mouth line and mouth
corners, just above chin and upper lip cleft).
|
|
Step
15 (Blend Dark Shadows) -
Use
the small detail brush to gently blend the dark shadows
of the detail areas. This time don't remove as much of the dark
layer as in previous steps. This will add nice contrast in the
final piece.
|

|
Step
16 (Allow to Dry) - Let
the piece set for 24-hours. Oils lighten over time and your
piece will blend naturally over time.
|
|
Step
17 (Dullcote) - This
is my "secret weapon". I spray the piece with dullcote
to seal it and also to help to blend the layers. The dullcote is
dry to the touch after about an hour and is completely dry
after 24-hours.
|
|
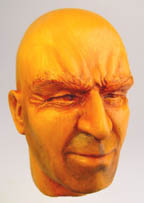
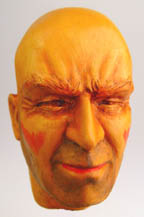
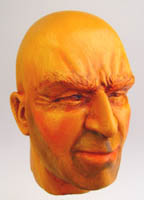
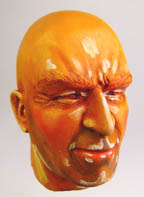
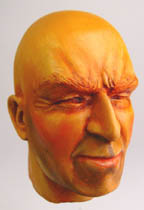
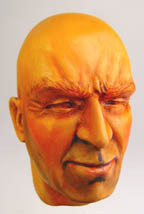
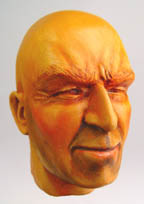
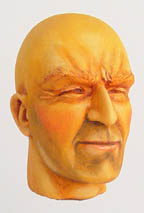
Multiple
Views of Completed Skin Tones 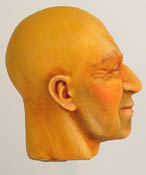  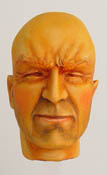 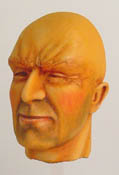 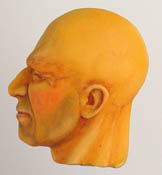
|
|
Continue
to Part 2, Eyes: 
All
Text and Images Copyright © 2019 Aces of Iron Productions Inc. All
Rights Reserved. Text, graphics, and HTML code are protected by US and
International Copyright Laws, and may not be copied, reprinted,
published, translated, hosted, or otherwise distributed by any means
without explicit permission from Aces of Iron Productions Inc.
info@acesofiron.com
|