Aces of Iron Productions, Inc. ~ info@acesofiron.com
|
Aces of Iron Productions, Inc. ~ info@acesofiron.com |
|
|
        
|
Basics of Figure Painting (Continued) By Michael Johnson
The following is a very basic process for painting eyes.
Supplies:
Enamel Paint Colors Used
Brushes/Miscellaneous
Part II: Eyes |
||
|
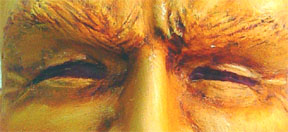
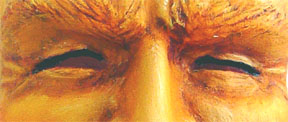
Step 1 (Base) - Paint the entire eye area with a Burgundy base (Include the inside of the lower eyelids and tear ducts) | ||
|
Step 2 (Dark Shadow) - Paint the inside of the upper eyelids with a flat black (This will add contrast and simulate the eyelashes). | ||
|
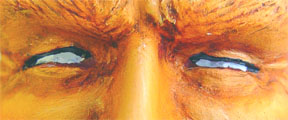
Step 3 (Eyeball) - Paint each eyeball with light gray. | ||
|
Step 4 (Mark the Pupils) - Use the fine point marker to mark the location of the pupil in each eye. Using a marker will reduce the chance the final figure ends up cross-eyed. | ||
|
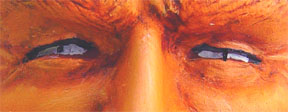
Step 5 (Define the Cornea) - Paint the entire cornea area using flat black. | ||
|
Step 6 (Color the Cornea)- Use your preferred eye color to paint the cornea, leave a flat black edge around both sides of each cornea. | ||

|
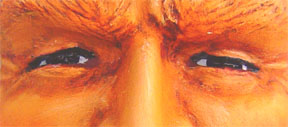
Step 7 (Add Pupils) - Paint the pupils using flat black. | ||
|
Step 8 (Add Highlight) - Paint a small flat white dot on the right half of each pupil. | ||
|
|
Step 9 (Dullcote) - Spray the figure with dullcote to seal the paint and blend the details. Some people add a spot of glosscote to the eyes, but I don't like the effect as reflecting light tends to wash-out all the details that were painted into the eyes. | ||
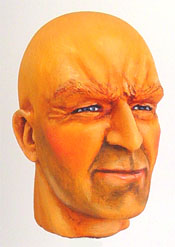
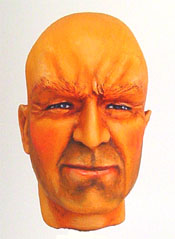
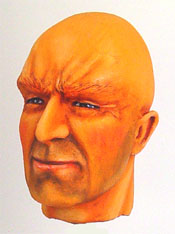
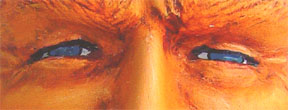
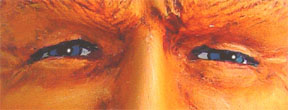
| Multiple Views of Completed Figure | |||
|
|
|||
|
Continue to Part 3, Eye Brows:
All Text and Images Copyright © 2003-2019 Aces of Iron Productions Inc. All Rights Reserved. Text, graphics, and HTML code are protected by US and International Copyright Laws, and may not be copied, reprinted, published, translated, hosted, or otherwise distributed by any means without explicit permission from Aces of Iron Productions Inc. info@acesofiron.com
|
|||