Aces of Iron Productions, Inc. ~ info@acesofiron.com
|
Aces of Iron Productions, Inc. ~ info@acesofiron.com |
|
|
        
|
Basics of Figure Painting (Continued) By Michael Johnson
The following is a very basic process for painting Leather. The instructions for brown leather are in Black and instructions for black leather are in light blue. Note, many of the processes and colors are the same for either brown or black leather.
Supplies:
Enamel Paint Colors Used
Brushes/Miscellaneous
Part IV: Leather |
||

|
Step 1 (Base) - For either brown leather or black leather, the base color is the same, paint the entire leather area with flat black and allow paint to dry completely. | ||
|
Step
2 (Mid Highlights) - For
brown leather, use
the burnt sienna to "Dry brush" the color to the raised areas
of the leather. Dry brushing is a process of first wiping most
of the paint from the brush then gently dragging the brush over
the surface of paint area. The paint will adhere to the raised
areas and will not seep into the deep areas.
For black leather, use the raw umber to "Dry brush" the color to the raised areas of the leather. |
||
|
Step
3 (Final Highlight) -
For
brown leather, mix (3) parts flat yellow to (1) part flat
red and (1) part burnt sienna to create a light orange-brown.
"Dry brush" the color to the raised areas of the
leather using more paint towards the seams or edges of the
leather. This step will age the leather and the more orange
added, the older and worn the leather will appear. My reference
photo has heavy highlights to create an antique look.
For black leather, use the model master "leather" color as the final highlight. Use the highlight color sparingly on black leather, just try to add some wear to the seams and areas where the leather would be well worn. |
||
|
|
Step 4 (Dullcote) - Spray the whole sculpture with dullcote to blend and seal. | ||
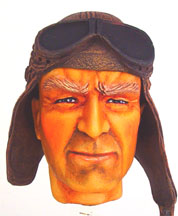
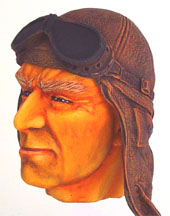
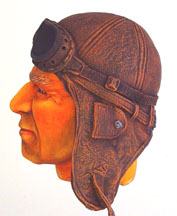
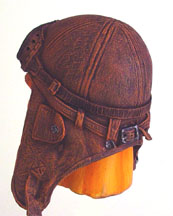
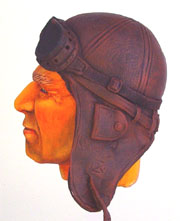
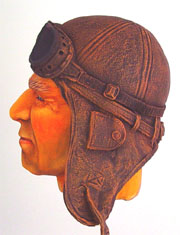
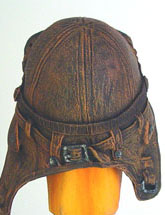
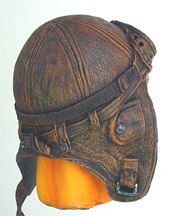
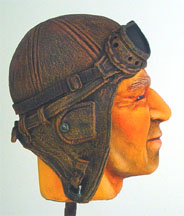
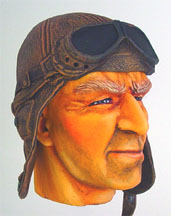
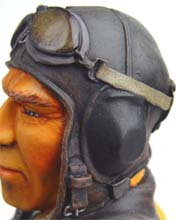
| Multiple Views of Completed Figure (Brown Leather) | |||
|
|
|||
|
|||
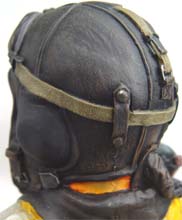
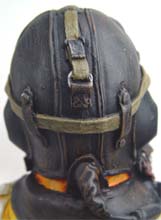
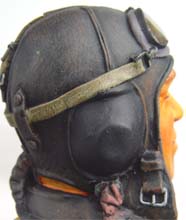
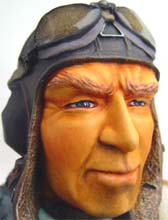
| Multiple Views of Completed Figure (Black Leather) | |||
|
|||
|
Continue to Part 5, Goggles:
All Text and Images Copyright © 2003-2019 Aces of Iron Productions Inc. All Rights Reserved. Text, graphics, and HTML code are protected by US and International Copyright Laws, and may not be copied, reprinted, published, translated, hosted, or otherwise distributed by any means without explicit permission from Aces of Iron Productions Inc. info@acesofiron.com
|
|||