Aces of Iron Productions, Inc. ~ info@acesofiron.com
|
Aces of Iron Productions, Inc. ~ info@acesofiron.com |
|
|
        
|
Basics of Figure Painting (Continued) By Michael Johnson
The following is a very basic process for painting the uniform.
Supplies:
Enamel Paint Colors Used
Oil Paints
Brushes/Miscellaneous
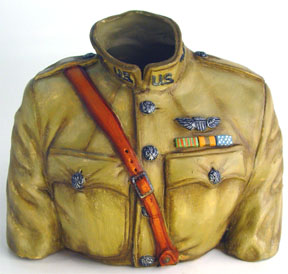
Part VI: Uniform |
||
|
Step 1 (Base) - Paint the entire uniform with a base of 2 parts Armor Sand mixed with 1 part Field Drab and allow paint to dry completely. | ||
|
Step 2 (Dark Shadows) - Blend equal parts yellow ochre with raw umber and paint the mixture into the deep recesses of the uniform. | ||
|
Step 3 (Shadows, Blending) - Use the clean soft dry detail brush to gently blend the shadows. Blending is a process of removing the thick areas of the paint with the soft dry brush and blending the edges into the undercoat with a soft zig-zag motion. | ||
|
Step 4 (Highlights) - Use the medium detail brush to apply a thin layer of a mixture of 2 parts flake white with 1 part yellow ochre to the raised areas. Allow the paint to set for about an hour before proceeding. | ||
|
Step 5 (Highlights, Blending) - Use the clean soft dry detail brush to gently blend the highlights using the same blending process described in step 3. | ||
|
Step 6 (Final Highlights) - Use the medium detail brush to apply a thin layer of "Flat or Flake White" as shown. Allow the paint to set for about an hour before proceeding. | ||
|
Step 7 (Highlights, Blending) - Use the clean soft dry detail brush to gently blend the highlights using the same blending process described in step 3. | ||
|
Step 8 (Dullcote) - Spray the piece with dullcote to seal it and also to help to blend the layers. The dullcote is dry to the touch after about an hour and is completely dry after 24-hours. | ||
|
Step 9 (Detail) - Paint the details as preferred, I used flat back "drybrushed" with steel for the metal components. The leather strap was painted as described in the leather section and I added some color to the piece with the awards on his chest. | ||
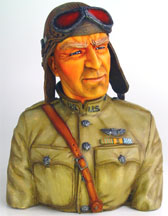
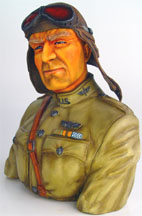
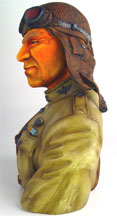
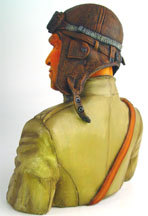
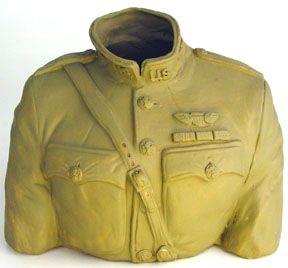
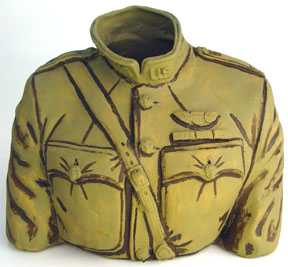
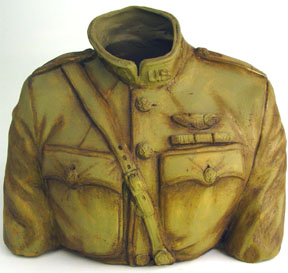
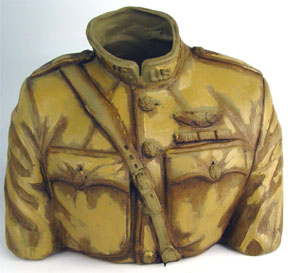
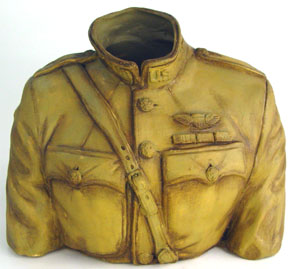
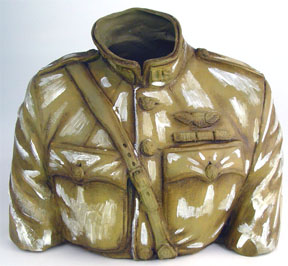
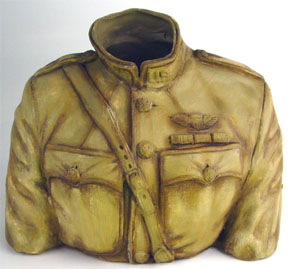
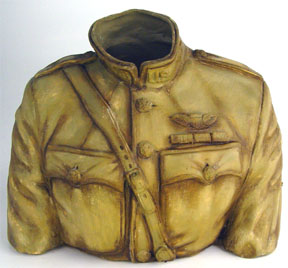
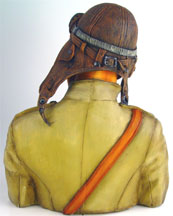
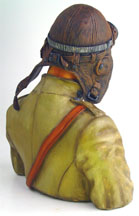
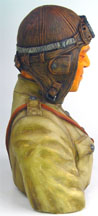
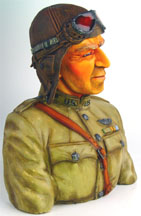
| Multiple Views of Completed Figure | |||
|
|
|||
|
|||
|
Continue to Part 7, Canvas:
All Text and Images Copyright © 2003-2019 Aces of Iron Productions Inc. All Rights Reserved. Text, graphics, and HTML code are protected by US and International Copyright Laws, and may not be copied, reprinted, published, translated, hosted, or otherwise distributed by any means without explicit permission from Aces of Iron Productions Inc. info@acesofiron.com
|
|||